

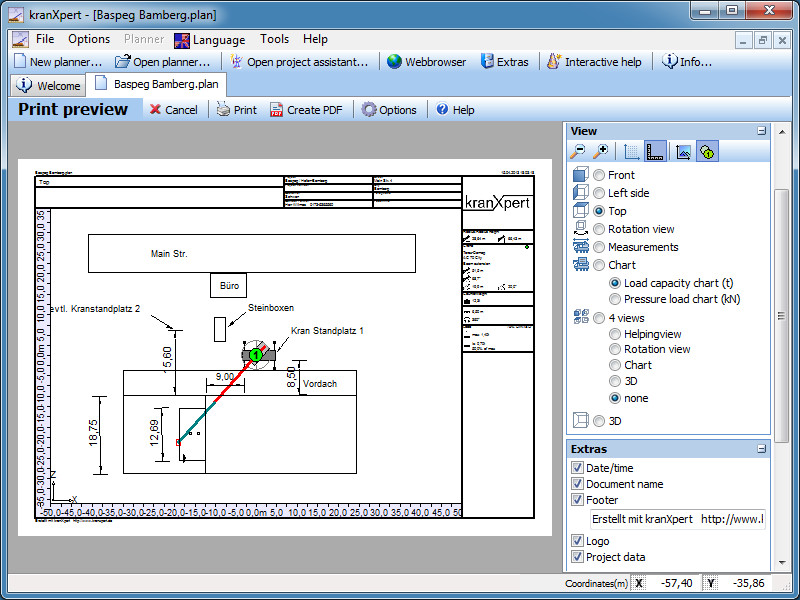
Add image to planner
To add a image to the planner click on the 'Add image'
 button in the drawing toolbar, then you have three different sources types to add the picture.
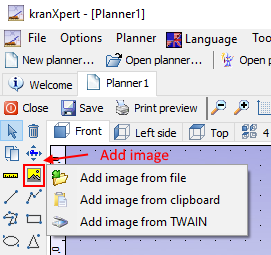
Add image from file
It shows the Windows file dialog and you can select and open the picture file that you want add to the planner.The supported bitmap file types are jpg, png, bmp and gif and the supported vector formats are emf and wmf.
Add image from clipboard
This is only enabled if a picture is in the Windows clipboard.You can add a image to the Windows clipboard by:
- Make a screenshot, press the print key on the keyboard.
- Using the 'Snipping Tool' from Windows, after you have create the screen snip click on the copy button to have the picture in the clipboard.
- Using Paint or Paint.net or other image applications and copy the picture to clipboard.
If you want use a Google-Maps picture, start your webbrowser, make the browser full screen, open the Google-Maps page and zoom the view, now use the 'Snipping Tool' or the key print to make a screenshot. Now add the image to kranXpert with the 'Add image from clipboard' tool button.
Add image from TWAIN
Here you can import images from a image scanner or digital camera using the TWAIN interface.
Picture properties
Click on the image in the planner to get the picture properties.
Here you can set:
 Length of the image
 Height of the image
 Diagonal length on the image
 Proportional if that is checked then the image is changed his size proportional
 Locked you can prevented that the object can be moved or deleted
Move the image
Click with the left mouse button on the image and hold down the mouse butten and move the mouse.
Scale the image
You can scale the image by changing the image properties length, height and diagonal, select the image in the planner with the left mouse butten and move the grip rectangle or you can dimensioning a image in the 'Image edit' window.
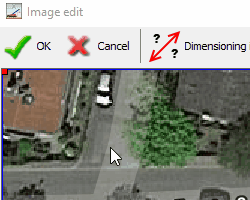
Image edit
To edit the image double click the image or in the image properies click on the tool button  .
.Edit margins
To add a margin, move the mouse cursor in a corner when you over the red rectangle then the mouse cursor changed the symbol. Press the left mouse button to move the margin.
Dimensioning image
You can scale the image to the planner by positioning a dimensioning line and set the length.
Click on the 'Dimensioning image' button in the toolbar.
Now a edit box with the caption 'Dimensioning distance length' is showed and in the image is drawed a dimensioning line. Move the dimensioning line to a knowing length. When the mouse is over the arrow of the dimensioning the cursor is changed to a hand symbol and you can move the point. Is the mouse cursor a cross then you move the whole dimensioning. When the dimensioning is on the right place then insert in the edit box 'Dimensioning distance length' the length of the dimensioning line.
